The most amazing feature of Parse Server is that it’s accessible for developers of all skill levels.
Personally, I started playing around with Objective-C in 2012.
Parse was a way for me to build a complete online app, without having the in-depth knowledge of how to build networking, storage, user systems, etc.
The more I built with Parse, the more I learnt JavaScript, which has fortunately allowed me to contribute to Parse Server.
Although it might seem daunting, contributing to our great open-source project is encouraged to all developers, and in this blog post, I’m going to give you an insight as to how.
Cloning Parse Server
Ok. I like to use GitHub desktop as it’s a visual git tool and sometimes I find git to be confusing. The first step after installing is to make a copy (or “clone”) of the Parse Server repo locally.
- Press File > Clone Repository, select ‘url’ and type https://github.com/parse-community/parse-server

Next, select “Clone”.
Ok, great! Now we have a local copy of Parse Server.
Creating a Branch
In order to add code to Parse Server, we need to create a “code branch”. This allows git to track any differences from our contribution vs. the current codebase, so we can hopefully merge our changes with the repository in the future.
First, set the current repository to the clone of Parse Server, and then select the working branch, which is the “alpha” branch in case of the Parse Server repository.
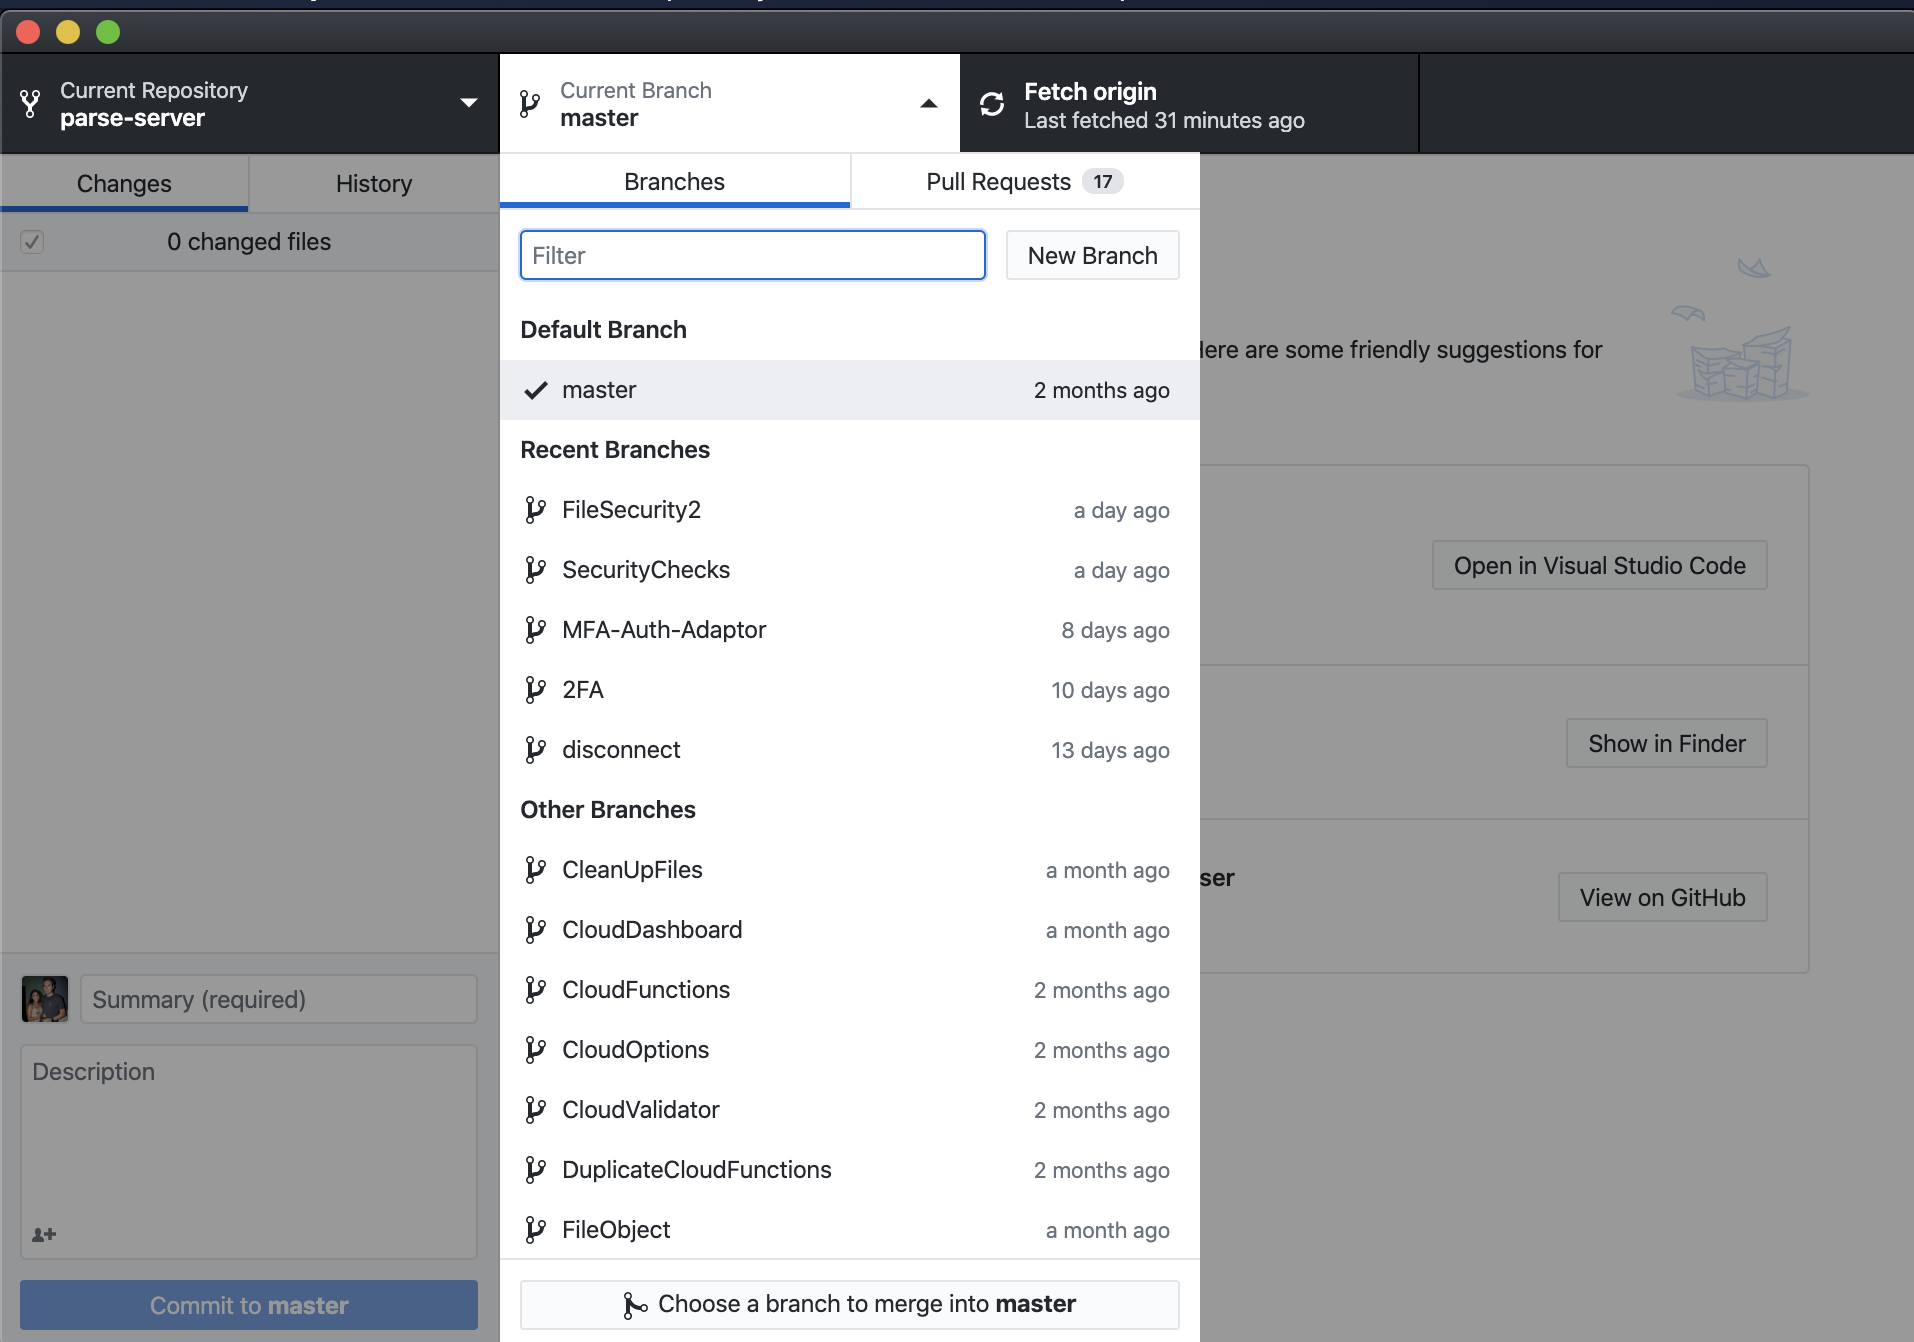
Next, select “New Branch. Name your branch appropriately according to the feature you are working on.

For this blog post, I am working on adding request.context to an afterFind trigger, so I will name this branch afterFind-context.
Diving in
Ok, now for the fun part! Next, select “Open the repository in your external editor”. I am using Visual Studio Code.
You will notice there are a lot of files here. Don’t be alarmed, we try to keep things as intuitive and organized as possible.
Let’s open a new terminal and run npm run watch so that changes to the src folder take effect.


Spec Files
The first thing I like to do for an issue like this, is write a failing test case so I can be clear as to what I am fixing.
If you’re not familiar with test cases, they are essentially javascript files that automatically test and ensure that logic prevails. Parse Server uses Jasmine tests to ensure that new features do not affect existing functionality.
You will find all the Parse Server testing under /spec.
The issue I am fixing is related to Cloud Code, so the spec file I am adding to is CloudCode.spec.js.

Here I have added my new test. You will notice that the code here is the same as you’d use in Parse Cloud code, with a few small changes.
itis used to tell Jasmine that this is a new test.fitis so that Jasmine will only run this test whilst I debug.expectis Jasmine method used to ensure expected outcomes of logic. In is example, an error will be thrown ifrequest.context.ais nota.
To run this test, click Terminal > Split Terminal and in the new terminal window, type npm test spec/CloudCode.spec.js. This might take a moment.
Here are the results:

As expected, the test failed with “Error: Cannot read property ‘a’ of undefined”. This confirms that this is indeed a bug, or a feature that is yet to be extended. So let’s get to work!
Isolating and Fixing
It can be daunting at first to work out where the changes need to be made. The Parse Core team and other contributors are always happy to give tips and pointers and would rather your time not go wasted, so always feel free to ask in the community forum. The notable files is also a good resource too. It’s unrealistic for us to expect anyone new to be fully across the code base, so there is no shame in asking for pointers.
The file I am working on to start is Triggers.js. Here’s the process I went to find that:
Parse.Cloud.jsis where the cloud functions are handled, and the afterFind section has the code:triggers.Types.afterFind- Searching the project (control / command F) for
triggers.Types.afterFindrevealsRestQuery.js RestQuery.jshas a functionRestQuery.prototype.runAfterFindTriggerthat calls the trigger,triggers.maybeRunAfterFindTrigger, which is located inTriggers.js
Looking at the other functions, they all have context passed to them, but maybeRunAfterFindTrigger does not. Let’s try apply the existing logic to maybeRunAfterFindTrigger
No context:

context:

So, let’s add context in, as it is in the other functions:

We also need to add the afterFind type to triggers with context:

Cool! However, when I searched maybeRunAfterFindTrigger, I noticed that no context element was passed from RestQuery. So we’ll add that:

Next, context is never passed to RestQuery.js, so it won’t know what this.context is. Let’s add that too, with a similar pattern to RestWrite.js:

Ok great. Now we’ve got to pass the final context parameter to RestQuery.js, and then we should be good to run our test again. The context argument needs to be added to new RestQuery(... in rest.js

Re-running the tests
I’m pretty sure I’ve added context everywhere it’s needed. I can always come back and continue editing the files, or temporarily add console.log in a few places to work out what’s going on.
Let’s run npm test spec/CloudCode.spec.js and see if the test passes:
Result:
Started
.


Ran 1 of 130 specs
1 spec, 0 failures
Awesome, this means that the test passed and request.context is now available in afterFind triggers!
Preparing for Merge
In order to merge with the master repo, let’s check a few things:
- Replace
fitin tests withit. It’s important that all new code added by the new features are captured by tests, so write more tests if required. - Run
npm testto make sure the new feature doesn’t break any other feature - Run
npm run prettierto clean up code style - Run
npm run lint-fixto fix any lint issues - Run
npm run lintto identify any remaining lint issues - Add our changes to the changelog
So, we’re all good to go! Let’s jump back into GitHub desktop.
Publishing your Branch

Here you can review all the changes you’ve made compared to the master branch. In order to upload these changes, type in a summary, and press Commit.
- If you see “You do not have write access to Parse-Server. Want to create a fork?”, press Create a Fork, and then Fork this Repository
The summary of the first commit is what will show under GitHub file structures, so I try to give a little explanation here.
Today I’ll use:
Fix: context for afterFind
Next, hit Publish Branch.
Now, your branch is available on GitHub. You can install this fork and test it on your own Parse Server using npm install github:myUsername/parse-server#my-awesome-feature.
GitHub Desktop will now say “Create a pull request from your current branch”. Press Create Pull Request. This will open GitHub in your browser to create a pull request (aka PR) that will add your changes to the master repo.
All you have to do from here, is fill out the form, and hit Create Pull Request. The core Parse Team will review your changes, provide feedback, and eventually merge the changes with the master.
You can see my PR for this feature here.
And that’s all! You’re on the way to becoming a Parse Contributor!
Remember, if you’re willing to contribute to our amazing project, the Core Team and many other contributors (such as myself 🤩) will be more than happy to help you learn. We are after all, a community.
Thanks for reading!